
There’s nothing better than to crack through the crunchy topping of a creme brulee. A smooth vanilla or almond custard with that signature bite of toasted, crunchy sugar. Yuuuuuuuuum!
The problem I found is there are so many recipes out there it’s tough to know which one to try. And often the recipe is difficult or has a lot (read A LOT) of steps. I’d tried quite a few of them and I’d basically given up. I either got brulee that wouldn’t set up or didn’t taste good. We won’t even mention the time I added salt instead of sugar, nope, won’t mention that one.
I like recipes with simple ingredients and instructions that are easy to follow. I like recipes where I can look forward to making that dish again and again instead of thinking, “Whew! Man am I glad I don’t have to go through that again!” It was enough to make me re-think all the recipes and just order creme brulee when I go out to a restaurant!
And then I happened onto the recipe I’m going to share. I found it really as part of the comments for another recipe in a Yahoo Group that no longer exists and the information wasn’t attributed to anyone as they didn’t sign their posts. So I have no one I can thank for sharing this awesome recipe. The recipe takes all the stress and guesswork out of making creme brulee. It’s darned near foolproof!
Preheat your oven to 275 degrees.
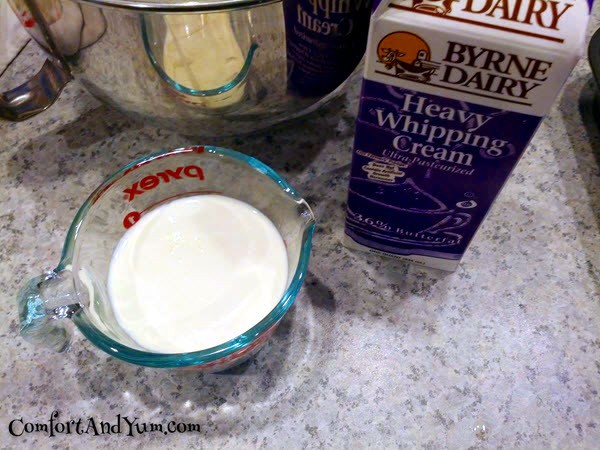
As a note, I want to mention that I’ve doubled and tripled this recipe with no issues or surprises. Measure out your heavy cream and pour into a large bowl. Since I mix using my Kitchen Aid mixer, I just dump everything there.
Next, you will need to separate your egg yolks and I swear this is the hardest part of the whole recipe! First, crack the egg over a container for the egg whites. Allow the egg to sit in one half of the shell. There will be some of the white that will start to drip into the container — that’s OK. It’s where the egg whites are going to end up anyway!
Save those egg whites for a different dish … did you know you can freeze egg whites?? Yup! Cool, huh? So if you don’t have a purpose for those egg whites now, no worries — freeze and they will be waiting for you when you need them.
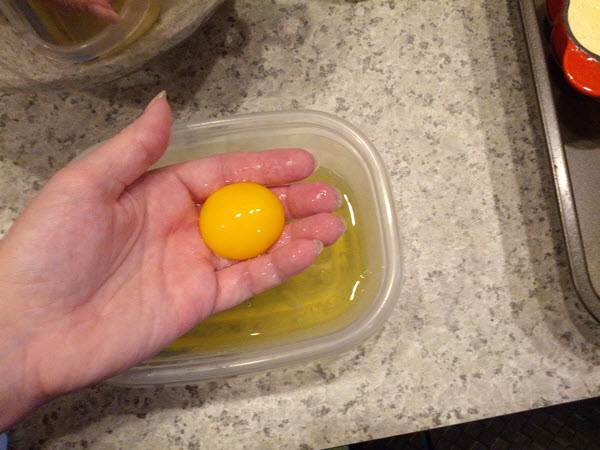
Dump the egg from the shell into your hand and let the white slip through your fingers. Once the white is in the container and all that’s left in your hand is the egg yolk, just add it to the large bowl with the heavy cream.
Now add your sugar and extract to the mixture. I used to use vanilla extract, but I recently started to use almond extract instead. I prefer the flavor of the dessert with the almond extract.
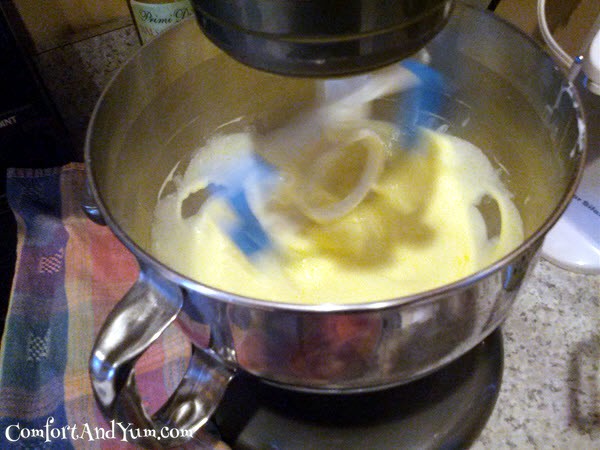
Mix well. As I mentioned, I use my Kitchen Aid mixer on it’s low setting. If you prefer, you can whisk it all up together.

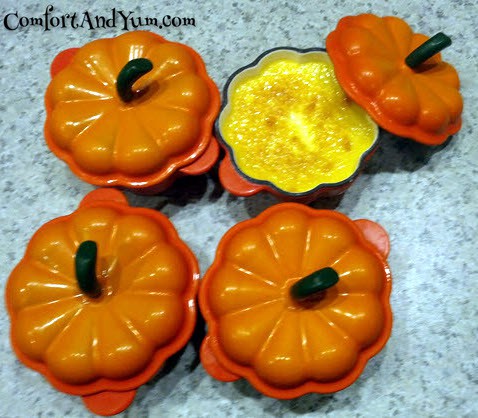
Now it’s time to prepare your ramekins for the oven. You can use any type of oven-proof bowl with high sides. I use standard ramekins most of the time, but I will also use seasonal bowls. Right now I’m looking for oven-proof bowls for most of the holidays — how fun is that!
You want to put your ramekins into a flat bottomed oven safe pan so that all of the ramekins sit level. The oven safe pan needs to have high sides because you’ll be adding water to the pan about half way up the sides of the ramekins as a water bath.
Fill the ramekins to split the mixture equally between them all.
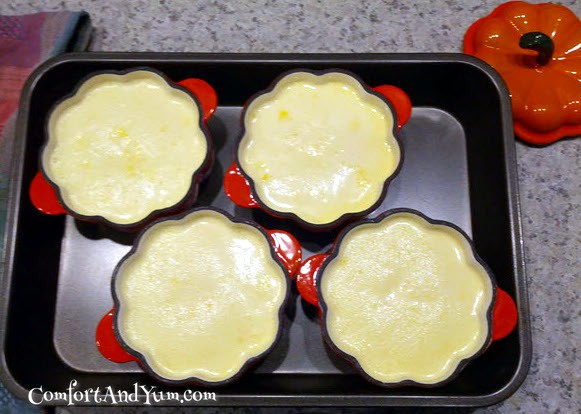
Fill the pan with hot tap water (not boiling) until it covers about half way up the sides of the ramekins and pop into the oven.
Set your timer for 1 hour and don’t open the oven door on the creme brulee during that hour … no matter how tempting it is. You aren’t done yet and the creme brulee isn’t finished. After 1 hour, check the ramekins every 15-30 minutes until you can slide a knife into the center and it comes out clean.
The last time I made creme brulee, I’d say that it took a total of about 2 hours or more. The low temperature is what makes this recipe foolproof. So it’s worth it to bake the creme brulee slowly.

When they come out of the oven, let them sit in their water bath until the water is tepid. Then remove the ramekins from the water bath onto the kitchen counter until the creme brulee is at room temperature.
Once the ramekins are at room temperature, place them in the refrigerator overnight (or at least a few hours) until the custard is nice and cold. If you put them in the refrigerator too soon (before they are at room temperature) the custard will sweat and you’ll end up with a layer of condensation on the tops of the ramekins. We want firm custard and a top that is as dry as possible for the sugar and torching that will take place right before you serve them.
Take them out of the fridge right before you are ready to serve them. Sprinkle with an even coat of white sugar. Using a butane or propane torch, melt the sugar on top to create a hard, crunchy coating.

Serve immediately. (If you torch too soon, you run the risk of the coating getting soggy — ask me how I know.)
Yum!
- 2 cups heavy cream
- 5 egg yolks
- 1/2 cup sugar
- 1 tablespoon vanilla or almond extract
- 1/2 cup white sugar
- Preheat oven to 275 degrees F.
- Whisk the cream, egg yolks, sugar, and vanilla extract together in a bowl. Mix it all up until it gets nice and creamy.
- Pour this mixture into ramekins.
- Place the ramekins in a baking pan. Fill the baking pan with hot water, about halfway up the sides of the ramekins.
- Place the pan with the ramekins in the oven for an hour. After 1 hour, check the ramekins every 15-30 minutes. You’ll know they’re done when you can stick a knife in one and it comes out clean.
- Remove the ramekins from the baking pan, set them on the counter, and let them cool until room temperature.
- Put them in the refrigerator and let them chill overnight.
- Right before serving time, sprinkle a thin layer of white sugar on the top of each ramekin. Make sure it completely covers the custard.
- Using a butane or propane torch, melt the sugar on top — being careful not to burn it.
- Serve immediately.
Wow! This recipe is so grrat! I always thought making creme brulee was such a long process! But this makes it do much more manageable! Thanks!
You are most welcome! Let me know how it turns out!
This is a fabulously easy recipe! Thanks so much for this tips on letting it cool, and when to do the topping. Those are the things that always trip me up!
Thank you so much for this recipe, this is by far the easiest creme brulee I have ever made, and it is the absolutely the most delicious. It is crazy how foolproof it really is! I would give it 10 stars if I could!!!
Cynthia,
Thanks so much! It’s so good it’s almost illegal, right? This is a holiday tradition for us now (and sometimes for special occasions too)!
It’s so delicious I’m making more right now, this must be the 6th time I’ve made it.
Just had to share that I’m now making this in the instant pot, 8 minutes and 5 minute pressure release, using less electricity and get it way faster.
Cynthia, I can’t wait to try it in the instant pot. We love creme brulee, but the downside to this recipe is how long it takes! Thanks so much for sharing!
I made this recipe for dinner with friends. It was delicious and everyone loved it. I followed the directions exactly and it took 2 hours to bake. I still can’t believe how well it turned out!
Mike, this creme brulee is a perfect dessert for dinner with friends! I’m so glad it turned out well for you.